Create Your First Broadcast

Step 1: Entering Broadcast Details
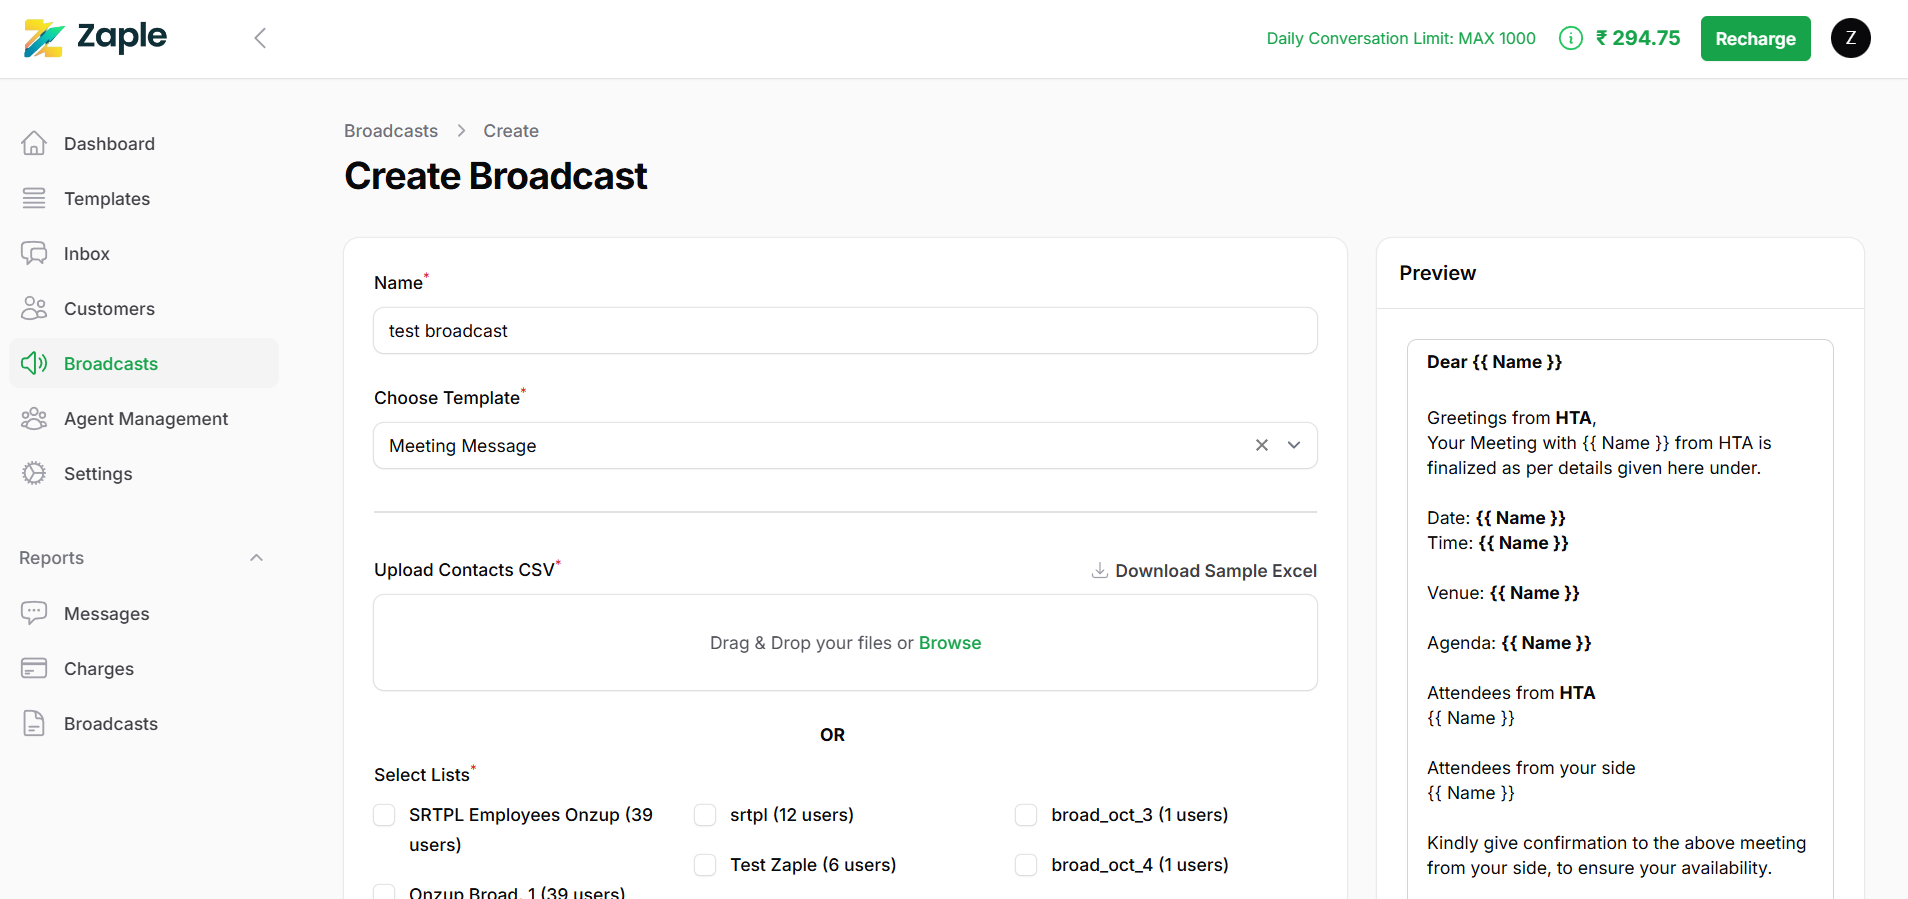
- Name: Start by entering a name for your broadcast in the “Name” field. This name is crucial as it helps you easily identify and organize your broadcasts later, especially if you plan to create multiple broadcasts over time.
Step 2: Choosing a Template
- Choose Template: Under the “Choose Template” section, select a pre-created message template for your broadcast.
- Search for Template: If you can’t find your template in the list, use the search bar to type in the name of the template. If nothing shows up, ensure the template was created earlier.
Step 3: Previewing the Message
- Preview: On the right side of the screen, a Preview section will appear, showing how the broadcast message will look once sent. This allows you to review the message’s formatting and content before finalizing.
- Placeholders: Any placeholders in the message, like {{Name}}, will be automatically replaced with actual recipient data, ensuring the message is personalized for each individual when it’s sent.

Step 4: Select Your Audience
- Select Lists: In the “Select Lists” section, you will see a list of available recipient groups or contact lists.
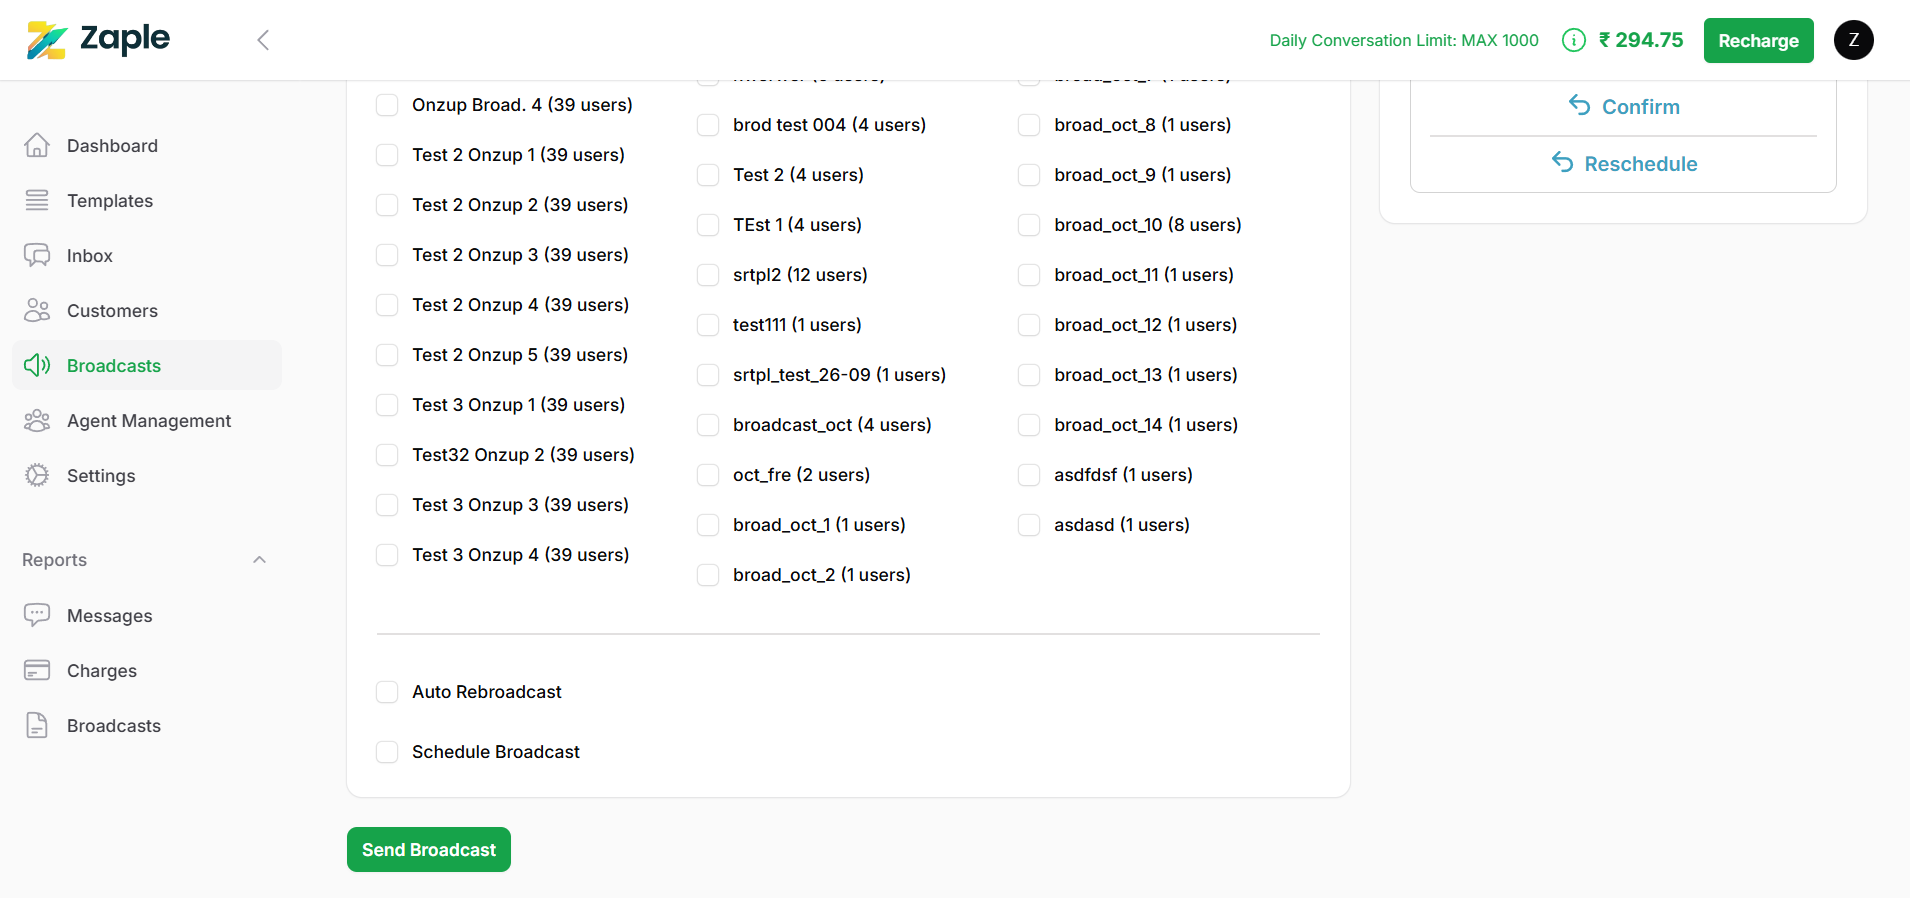
- Choose Groups: Scroll through the list and check the boxes next to the groups you want to target. Each group will have a label showing the number of contacts in that group.
- Multiple Groups: You can select multiple groups to widen the reach of your broadcast, ensuring your message goes out to a broader audience.
Step 5: Configure Broadcast Options
- Auto Re-broadcast: If you’d like the broadcast to be automatically resent to recipients who didn’t receive it the first time (e.g., due to a delivery issue), check the Auto Re-broadcast box. This ensures no one misses out on the message.
- Schedule Broadcast: To send the broadcast at a later time, check the Schedule Broadcast box. You will then be able to select the exact date and time you want the broadcast to be sent, allowing for more flexibility and timing control.
Step 6: Finalize and Send
- Review: Before finalizing, review all of your settings—confirm that the selected template, audience, and options are correct.
- Send or Schedule: Once you’ve reviewed everything and are satisfied, click on the “Send Broadcast” button at the bottom to either send the broadcast immediately or schedule it for a later time.
This concludes the broadcast setup process in Zaple, ensuring that your message is prepared and ready to reach the intended audience efficiently. Once you have customized your message, selected the recipients, and adjusted any additional settings such as scheduling or personalization options, you are all set to launch the broadcast. Zaple’s platform will handle the delivery, ensuring that each recipient receives the message according to the preferences and timing you’ve specified. This seamless process guarantees that your communication is sent out on time and with the appropriate level of personalization, helping you stay connected with your audience in a professional and effective manner.

